
Back to Restorative Appointments
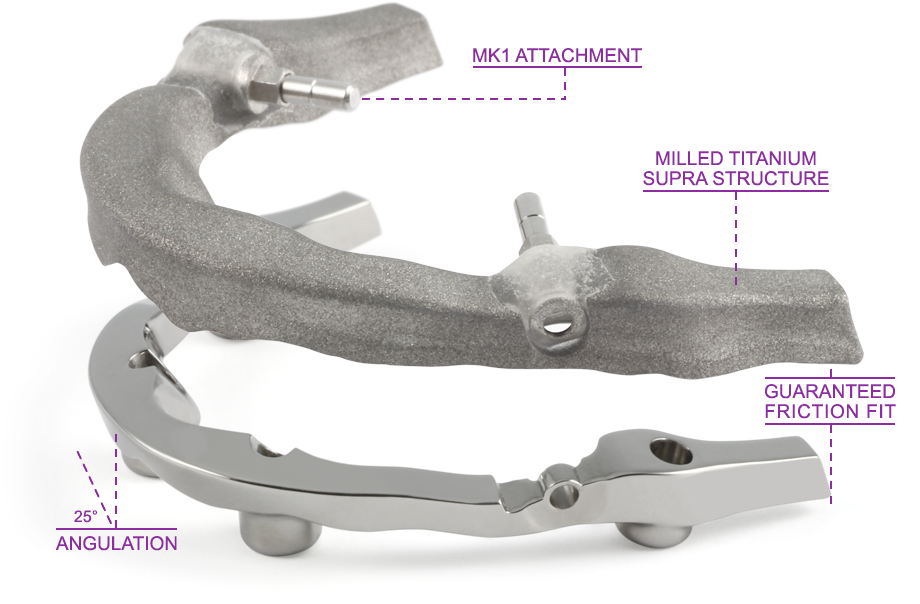
ReBourke is comprised of FDA approved CAD/CAM Titanium milled bar and overlay structure, premium denture teeth, and acrylic processed with Ivocap injection system. It is a new concept that allows patients to benefit from the advantages of both removable and fixed restorations. This appliance is secured by two MK1 attachments in the posterior area, giving the patient the same feeling as a fixed restoration. The secondary bar is designed to have a soft contact with tissue to seal the prosthesis. It works well for upper and lower jaws and it is possible for the patient to remove the prosthesis with the help of a small tool.
Advantages:
Easy Repair
High Esthetics
Superior Chewing Forces
Versatile with Implant Placement
Disadvantages:
Tooth Breakage (especially if the MIP plane does not coincide with CO)
Needs refurbishing every seven years of so.
Cost
Patient Requirements:
The patient needs to have good dexterity to maintain proper hygiene.
Must achieve to a hygiene protocol with water pick and Allure + Tepe Hygiene Kit.
Doctor's Requirements:
13 mm of restorative space from the incisal edge to the abutment platform.
Must have 6mm of space between two implants.
The MK1 attachment must be positioned in the posterior region preferably between bicuspid and molar.
Can be restored with or without multi-unit abutments.
Appointments:
With conversion, 4 Appointments are required.
Without conversion, 7 appointments are required.
Time in Lab:
With conversion, 37 working days (does not include weekends, holidays, and time in transit).
Without conversion, 42 working days (does not include weekends, holidays, and time in transit).
Warranty:
Bar: 5 Years
Teeth and Acrylic: 1 Year
MK1 Attachments: 6 Months
More Info
Price:
Call Lab for a price quote.
Night guard: $70 (Recommended)
Appointment 1
CAD/CAM Patient Removable Bar - Sequential Prescription
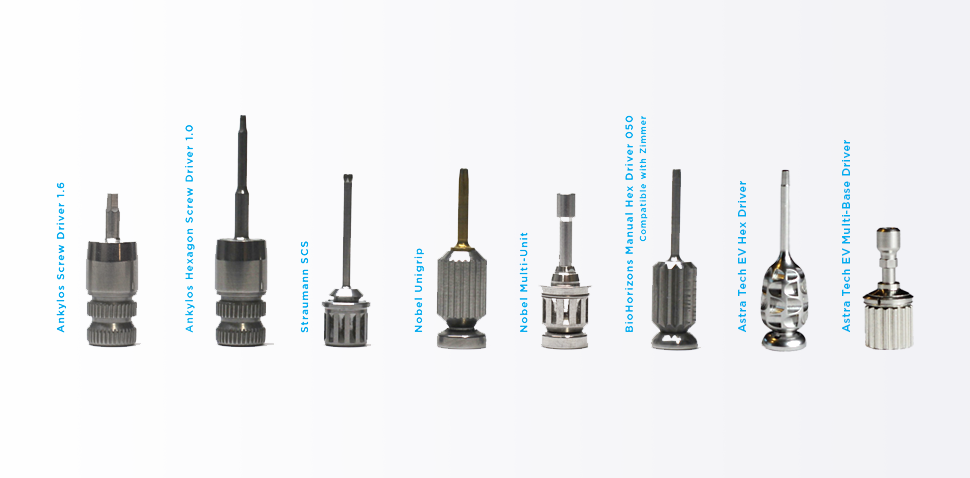
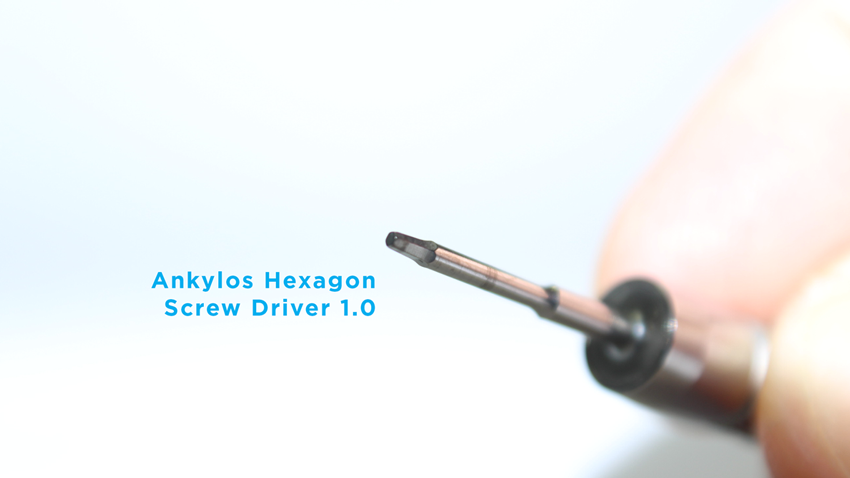
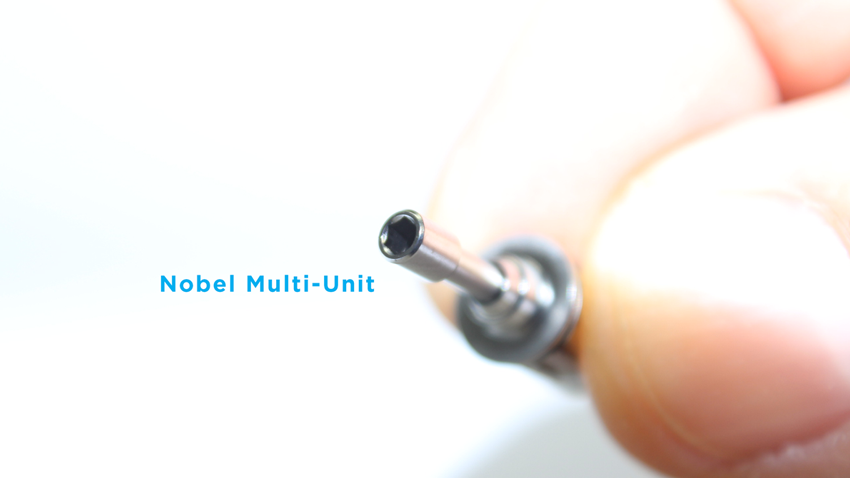
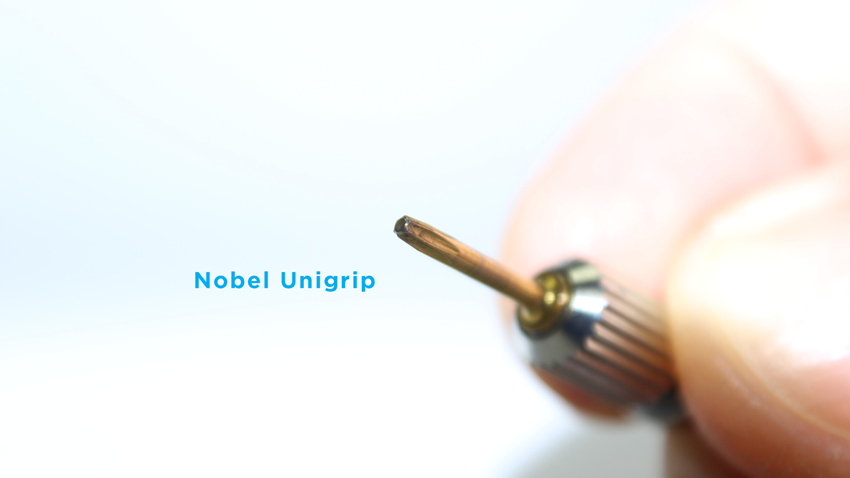
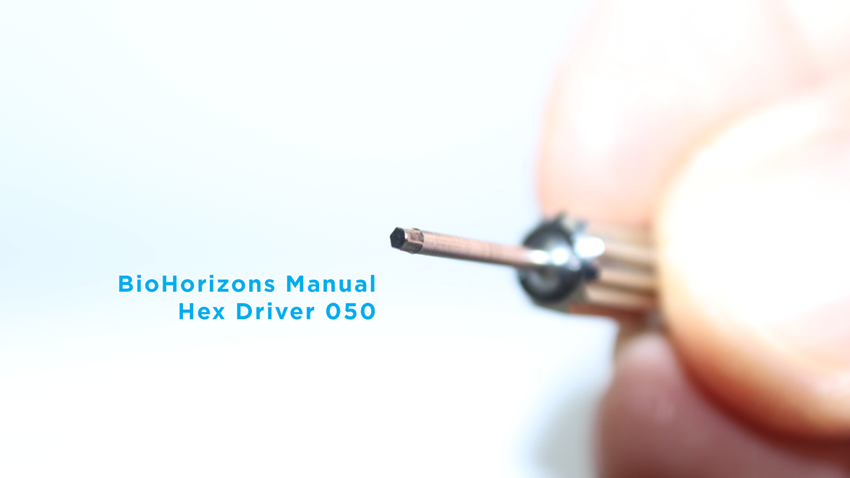
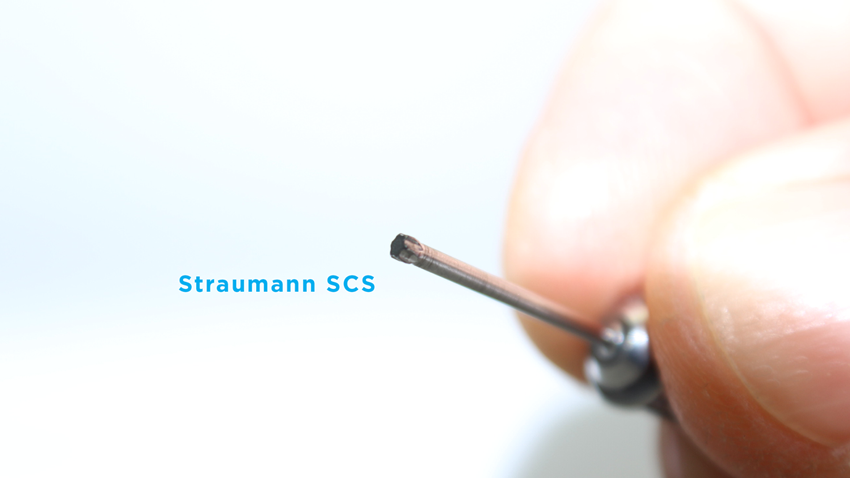
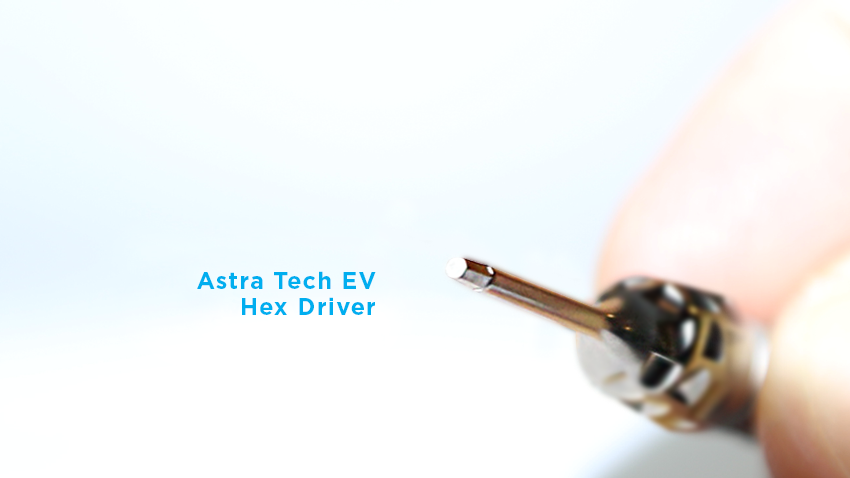
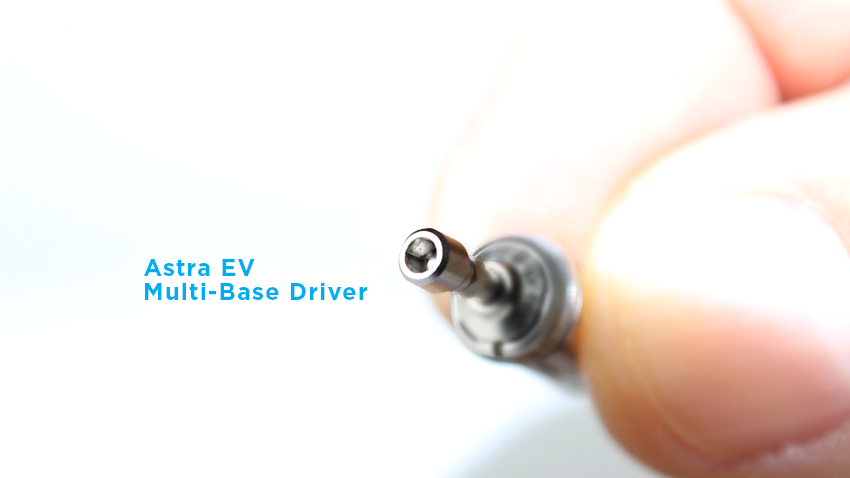
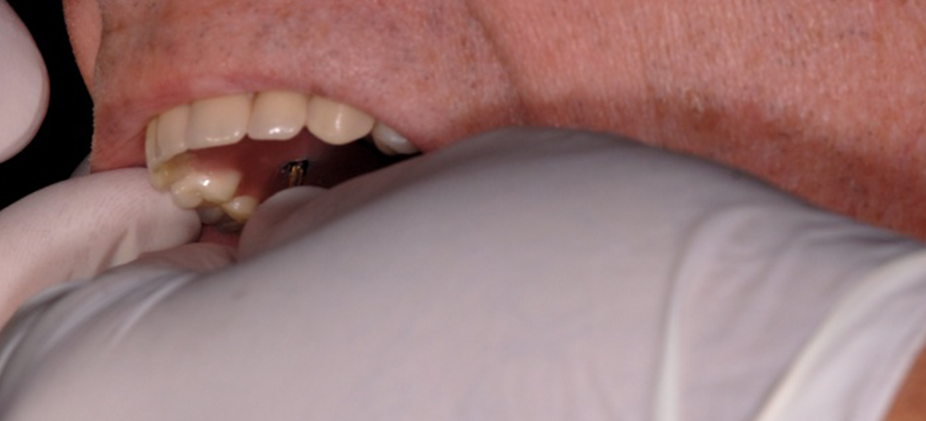
This is the first time that you are removing the temporary denture from the patient’s mouth since the day of surgery. You must make sure you are using the right driver from the right manufacturer.

It will be very clear to you if the patient is using their water pick and flossing under the temporary. If they are not, the temporary will be covered in tarter and food residue. The soft tissue around the abutments will be red and swollen. This outcome is not acceptable. Maintaining the temporary and final restoration is the responsibility of the patient. Serious complications such as restoration breakage or loss of implants may occur if the patient is not dedicated in taking care of their investment. We suggest that you protect yourself by having a conversation with the patient about this serious issue and record it.
Lutting the verification jig
You will receive from Allure Dental Studio a verification jig, which will be seated on the model that was made the day of surgery. They are pre-cut and labeled in sections. Note that you should have a space between each piece.
You will also receive a custom tray which fits perfectly over the jig. Note that the screws (guide pins) are extra-long and must poke through the tray.
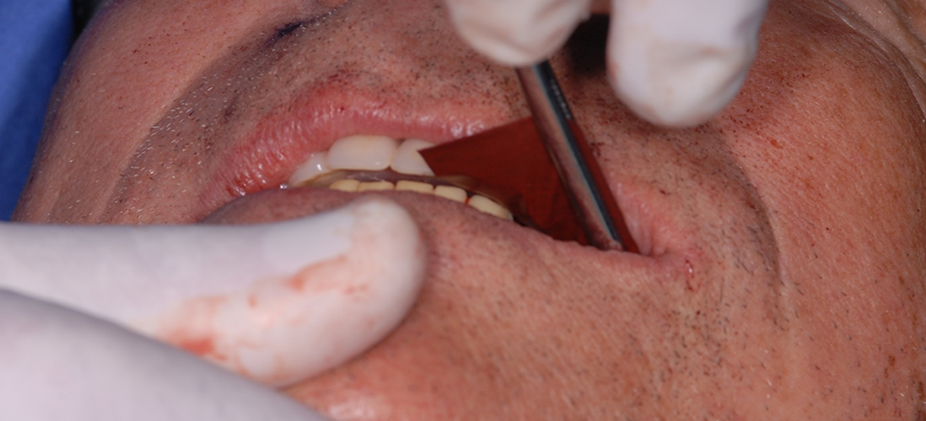
Before removing the temporary from the patient’s mouth, take a bite registration.
Remove the temporary from the patient's mouth. Remove the plug, Teflon, and all screws. When you unscrew the prosthetic screws they might stay in the access hole or come out attached to the driver. Always check the driver before putting it in the next hole. Once the temporary is removed from the patient’s mouth, give it to your assistant to have it cleaned thoroughly.
Check each abutment and make sure that they are all torqued to manufacturer specification. It does happen from time to time that an abutment might be slightly lose.
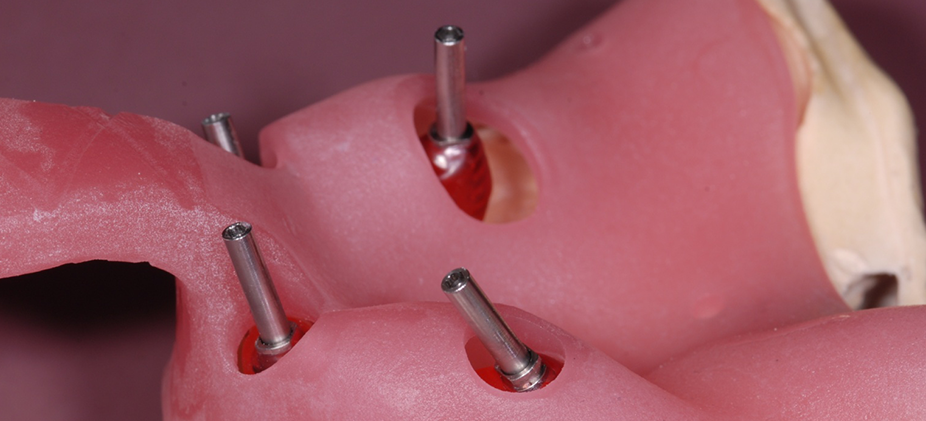
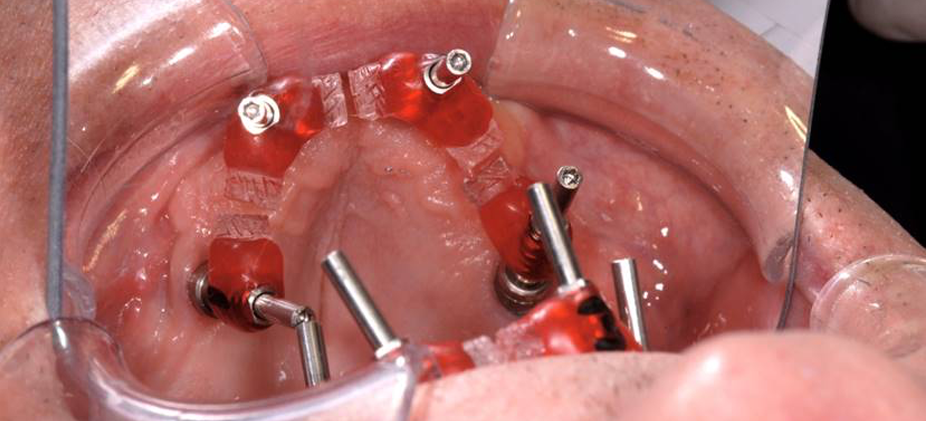
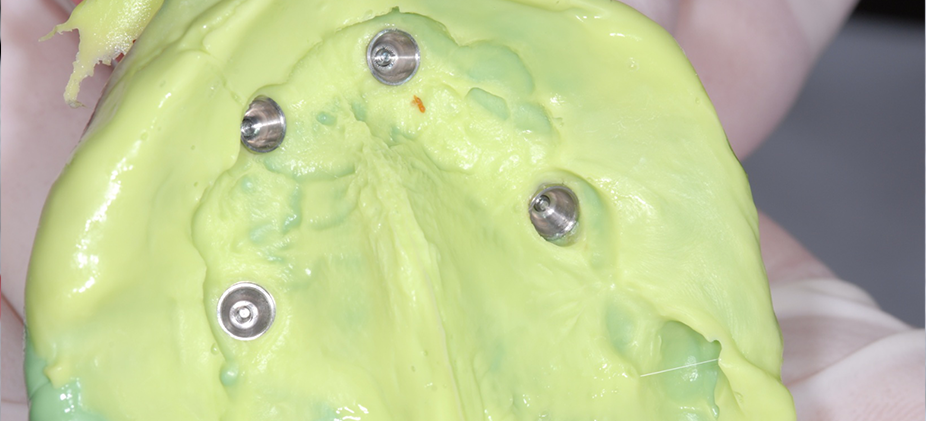
Remove one piece of the jig at a time, soak in Peridex and place in the patient mouth.
If one of the jig touches another piece, remove it and adjust with a carbide bur.
Note the placement of the jig intra-orally. The temporary abutments are non-engaging so you will have to positioned them as best you can then hand torque them with your driver.
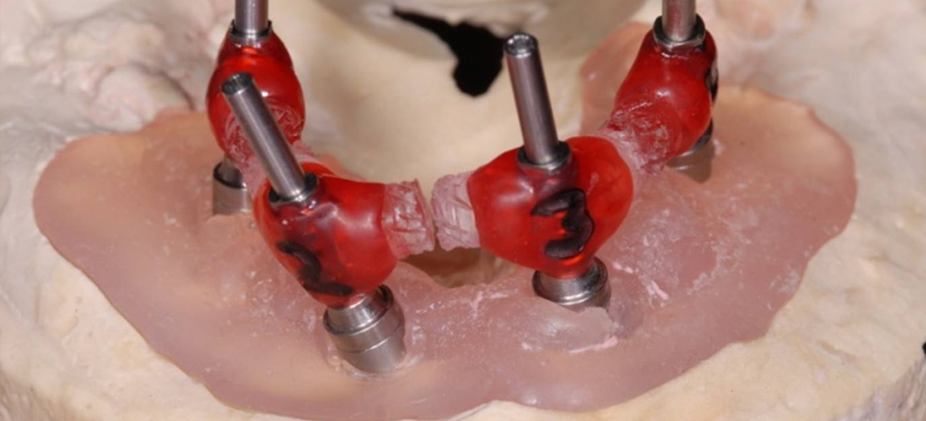
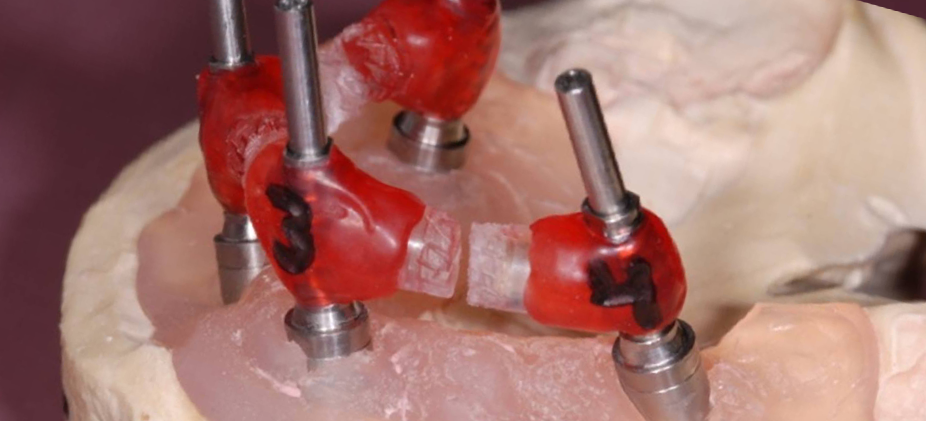
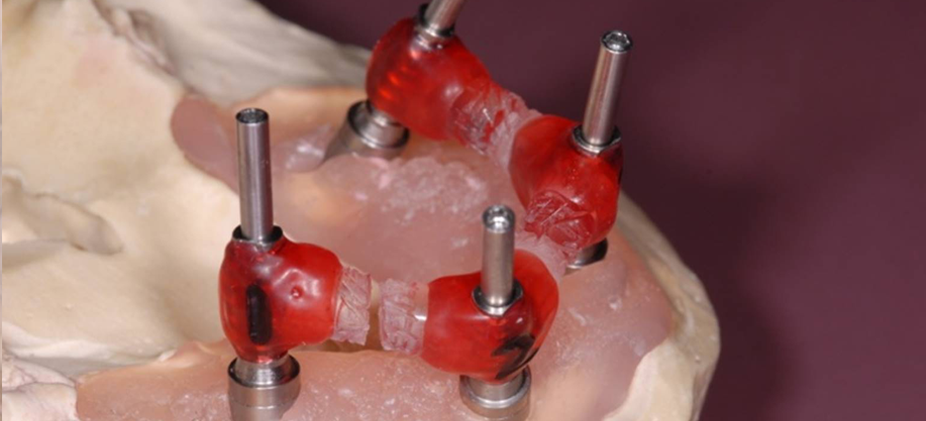
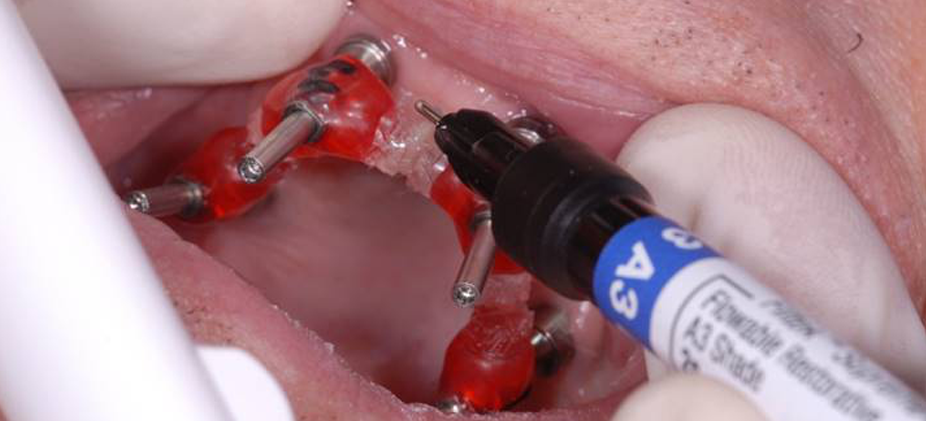
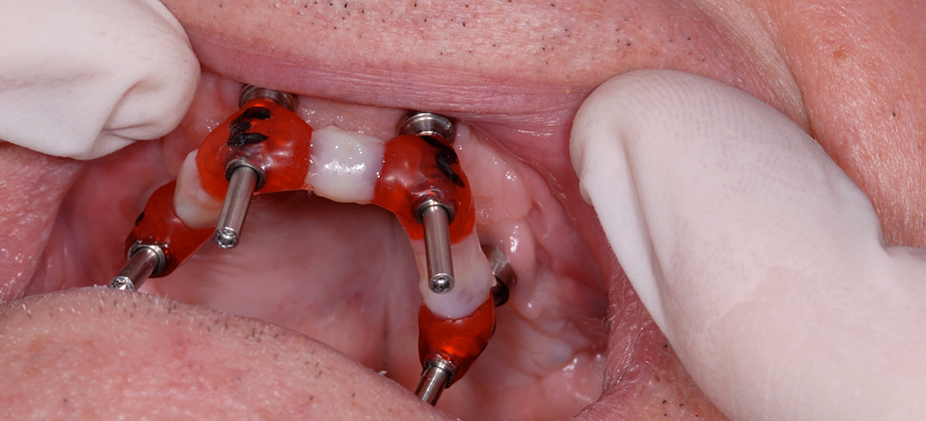
Connect all sections together with a generous amount of suitable material and extend to the left and right of the cut, above and beneath the cut. (e.g., Triad DuaLine, Dentsply; Zapit, Dental Ventures of America; GC pattern resin, GC America; any flowable resins or composites). Verify that the connections are solid, especially at the distal extremities.
Check visually for passive fit; if the interface is sub-gingival, take a radiograph to verify complete passive seating.
If a section is not seated passively, you must section, re-seat and re-lute the jig. Repeat until you get a perfect passive fit.
final impression

To ensure a passive fit of your custom-milled bar, it is extremely important to obtain an accurate final impression.
Before preparing the tray for the impression, practice the path of insertion into the patient's mouth. Once you feel comfortable with the path of insertion, prepare the provided custom tray with utility wax. Take a small piece and squeeze it between your fingers. Make the piece thin and apply it above each large hole. The reason for this is to control the impression material from not flowing through the holes.
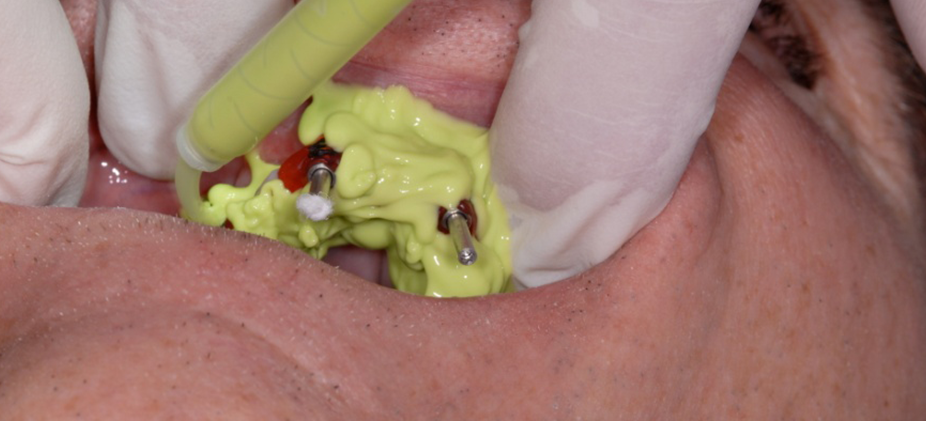
Fill the tray with heavy body impression material. Do not overflow, and do not cover the palate if you are taking an upper impression.
Apply light body impression material under and around the verification jig in the patient's mouth.
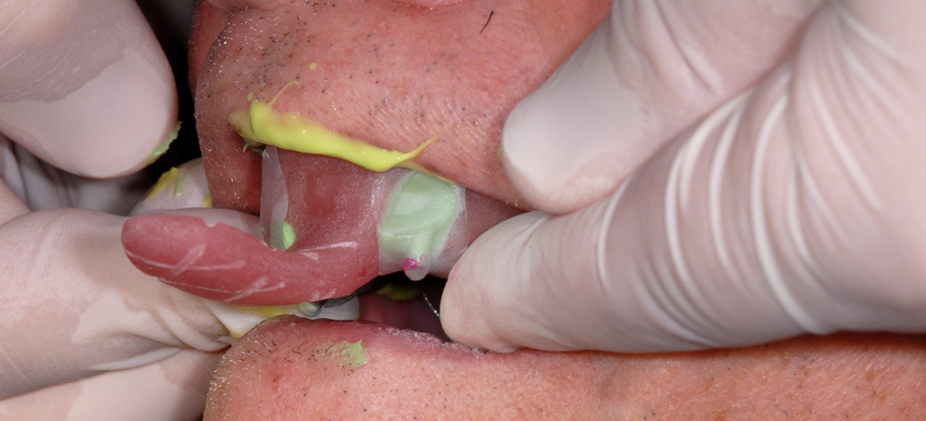
Take the impression to the patient mouth and immediately make sure that the long guide pins find their way through the wax. The guide pins MUST poke through the wax. If for whatever reason the guide pins are not coming through, move the tray around to find the pins. If you are unable to find them exposed, look for them with your finger. You probably put too much impression material in the tray.
Unscrew each screw and remove the impression from the patient’s mouth.
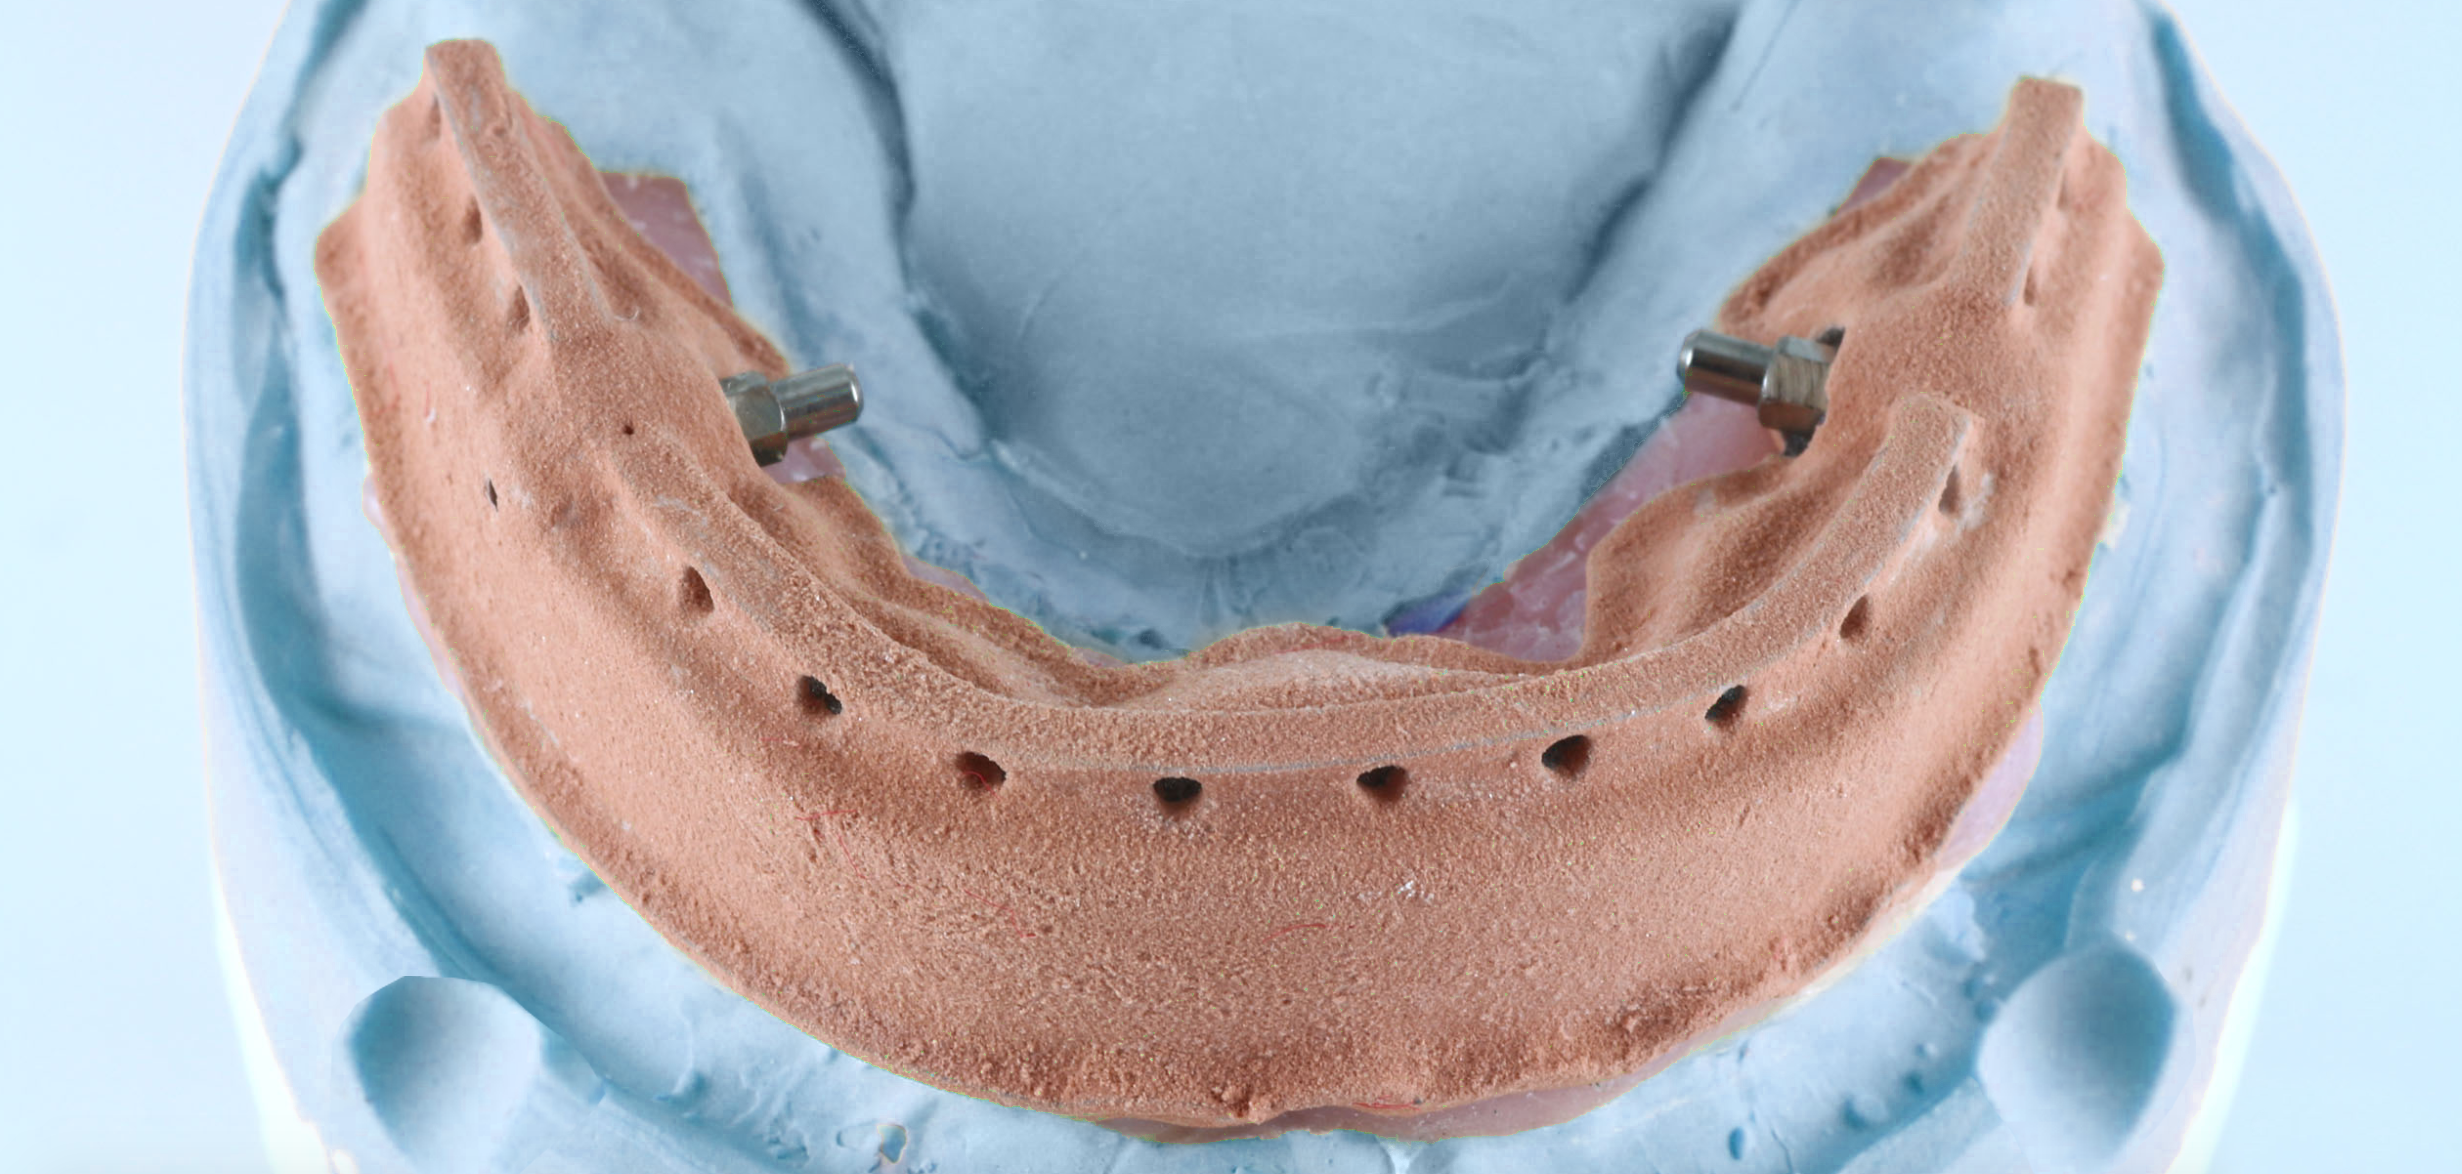
duplicating the temporary
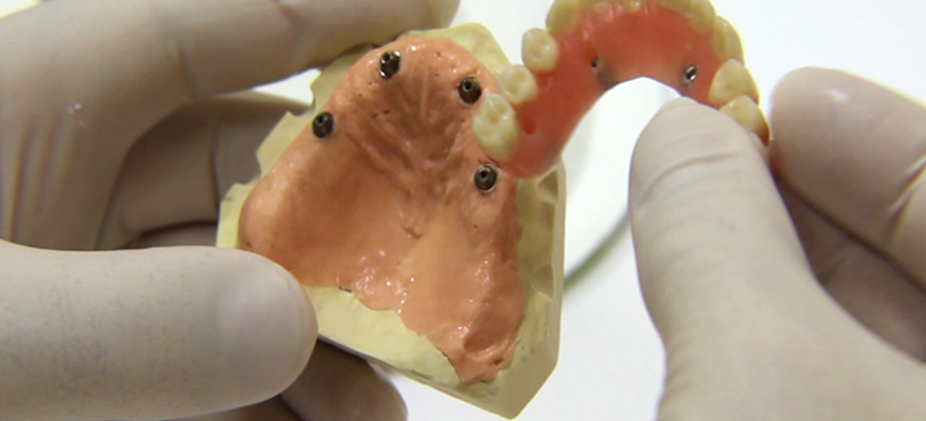

To save you a full restorative appointment, we also require that you duplicate the temporary, which will be utilized as a customized bite rim.
Take the provided model and remove the soft tissue by peeling it gently off the model.
Place the temporary appliance onto the model and hand torque 2 to 4 screws.
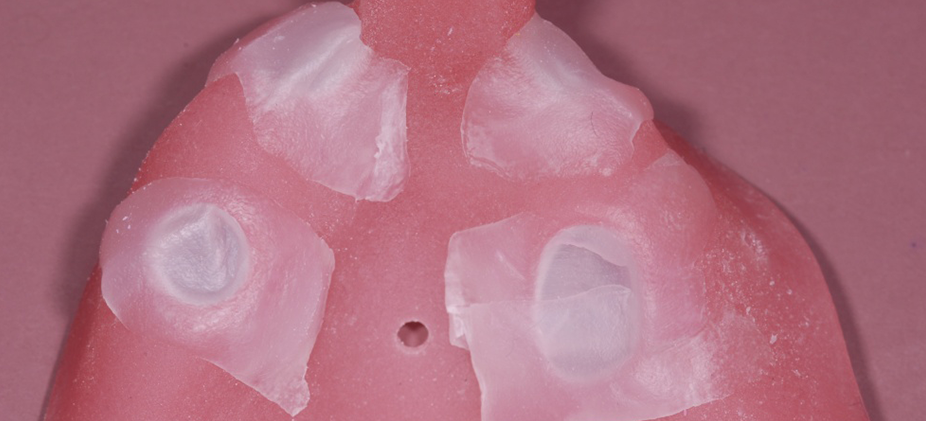
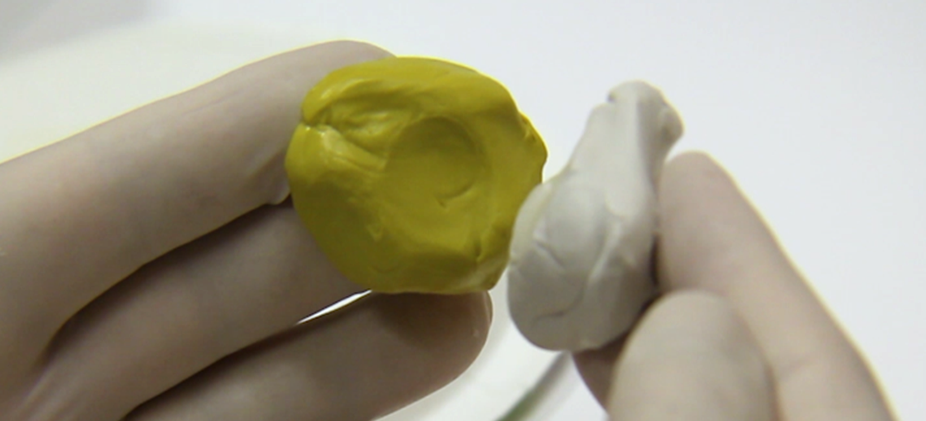
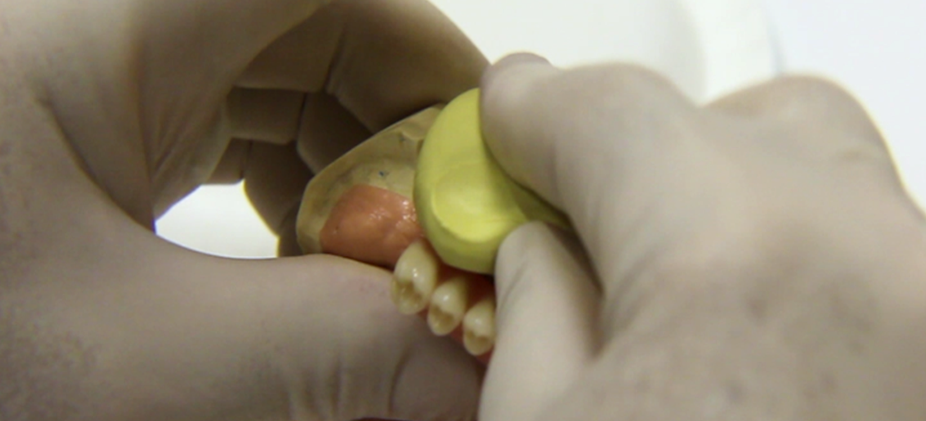
Mix thoroughly the matrix material that we provided to you.
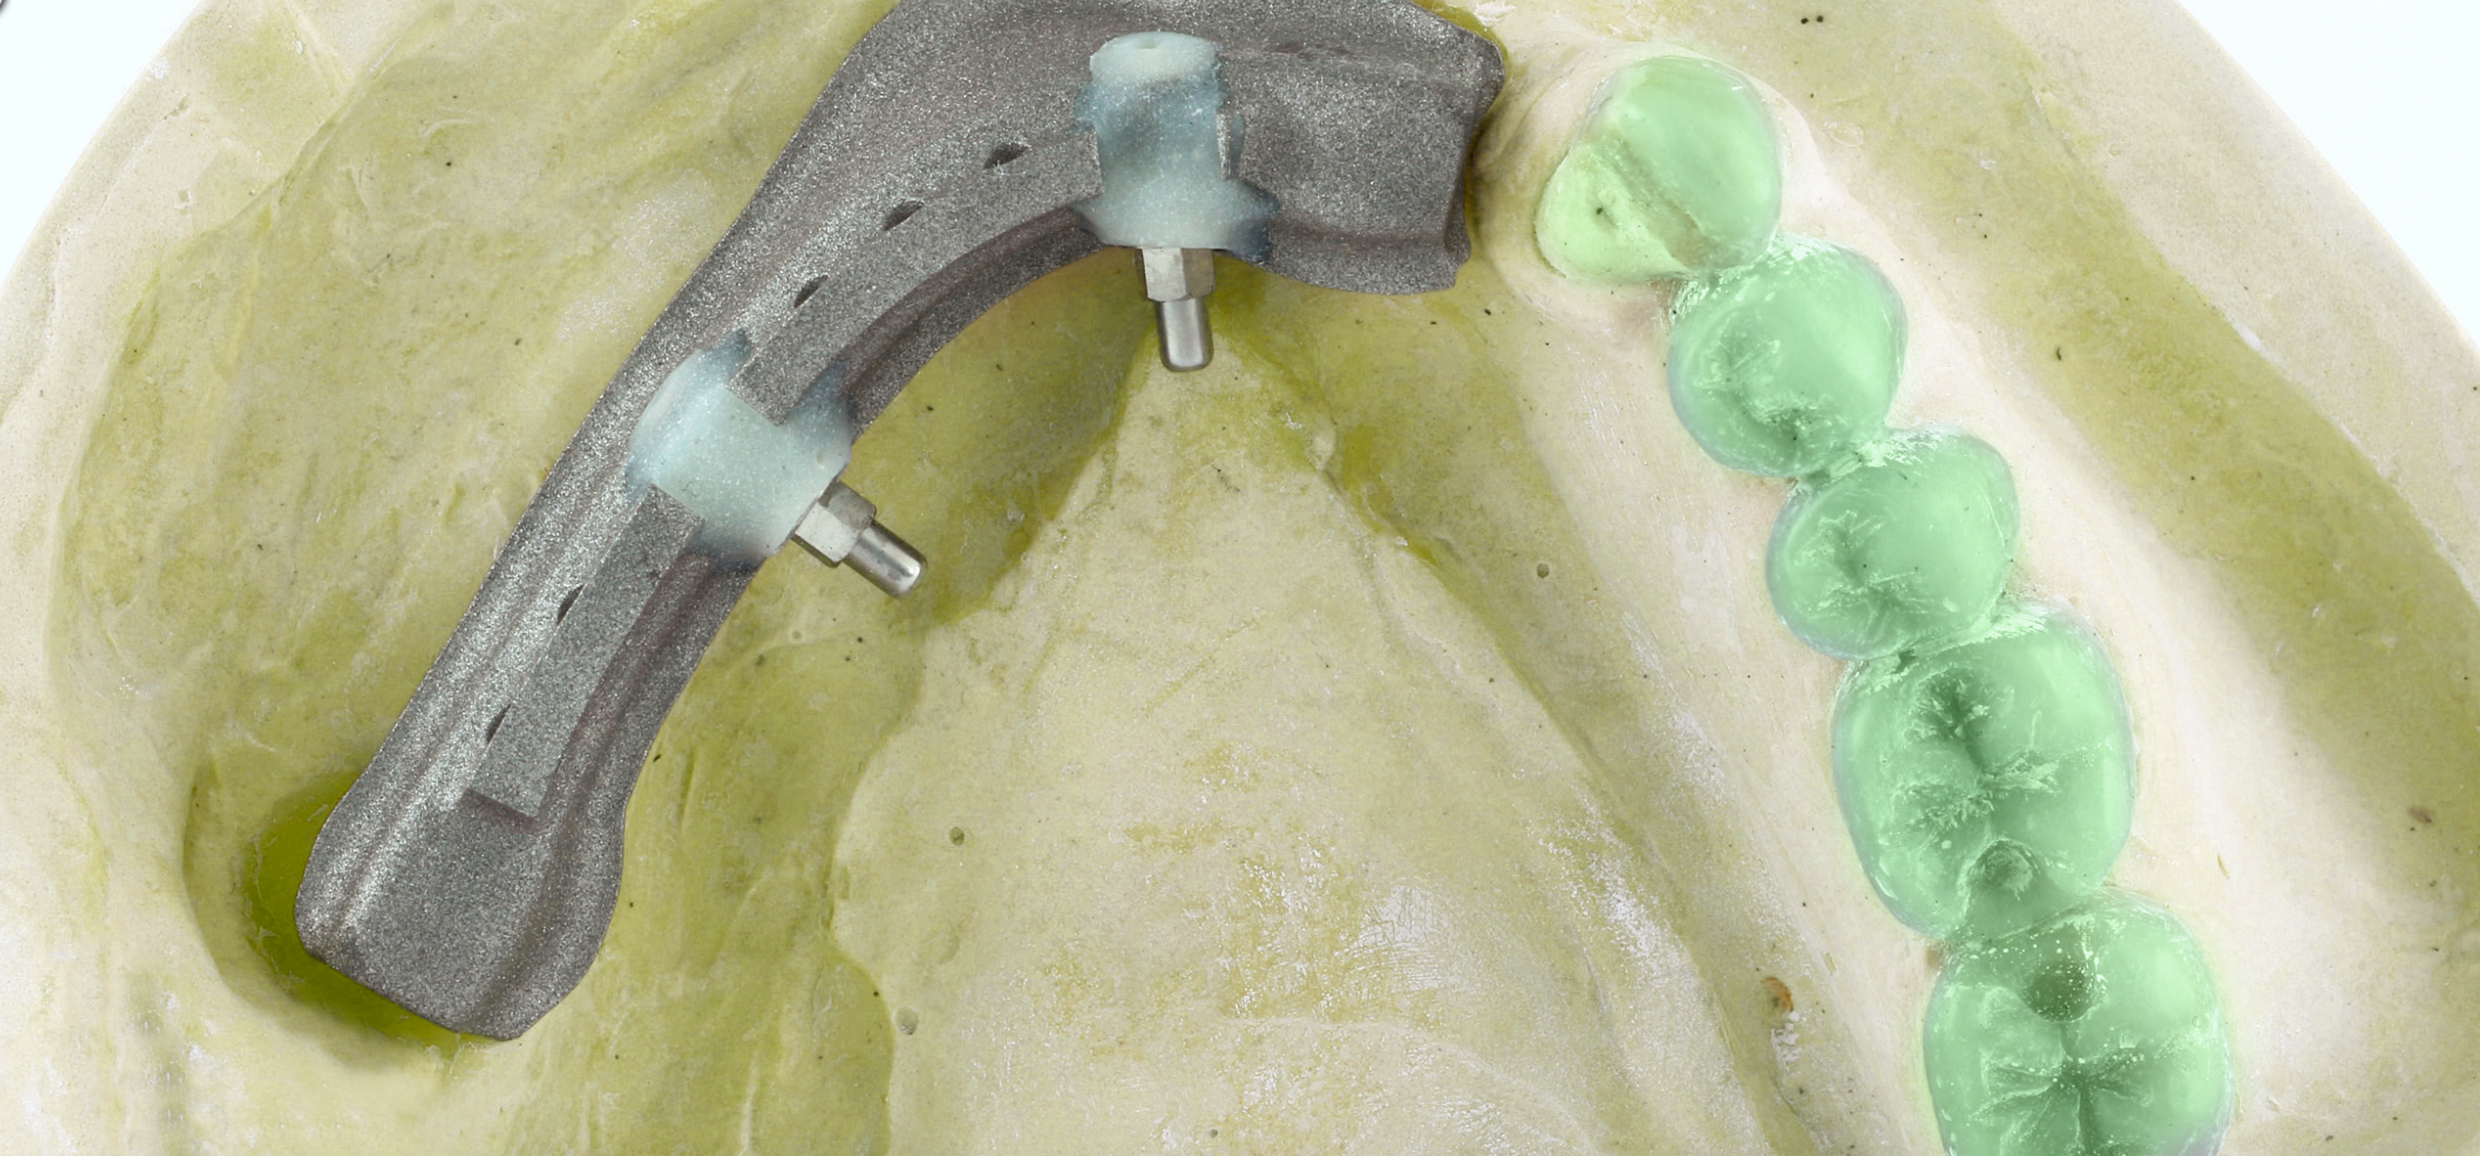
Apply matrix material to the model, the acrylic on the buccal/facial side, the facial aspect of the teeth, and the occlusion.
This picture illustrates the correct application of the matrix material.
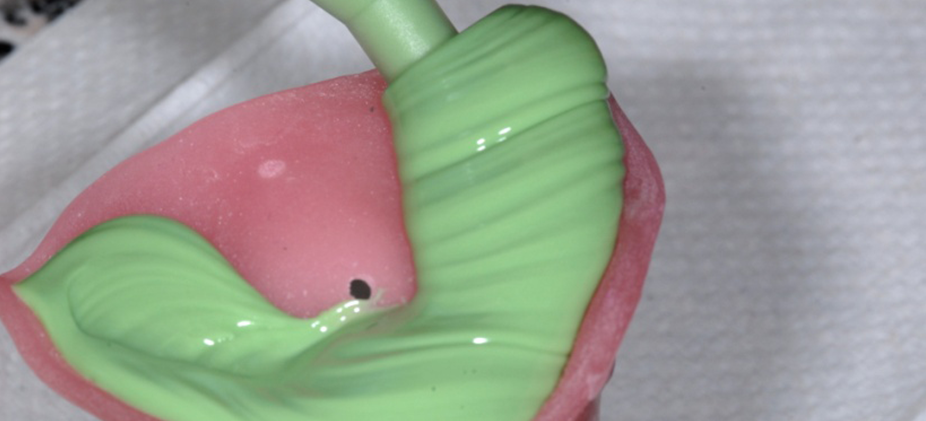
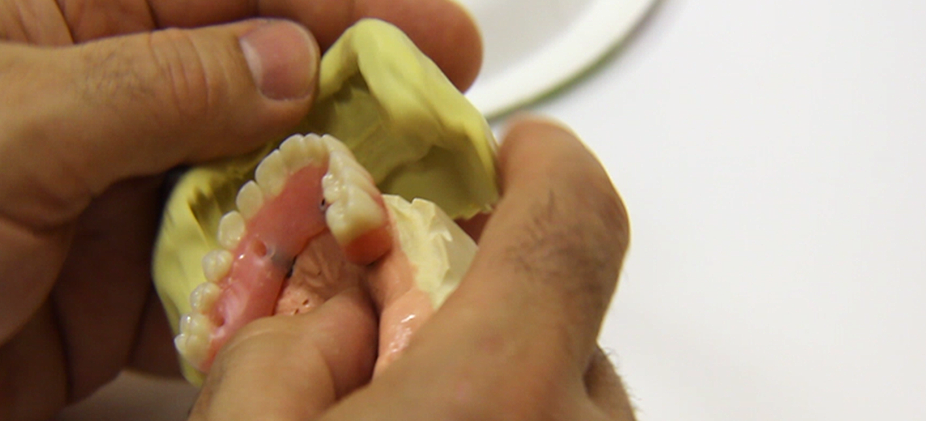
The picture illustrates an incorrect application of the matrix material. By wrapping the matrix material all the way around the model and temporary, you may have a very hard time removing the matrix due to undercuts.
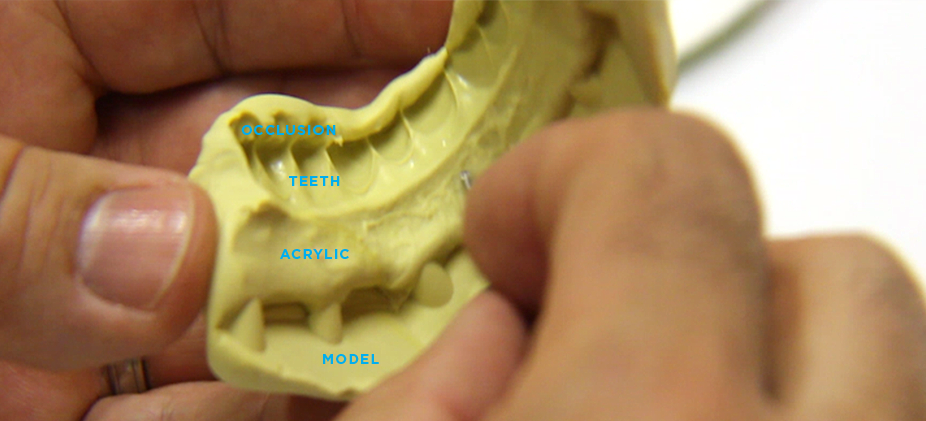
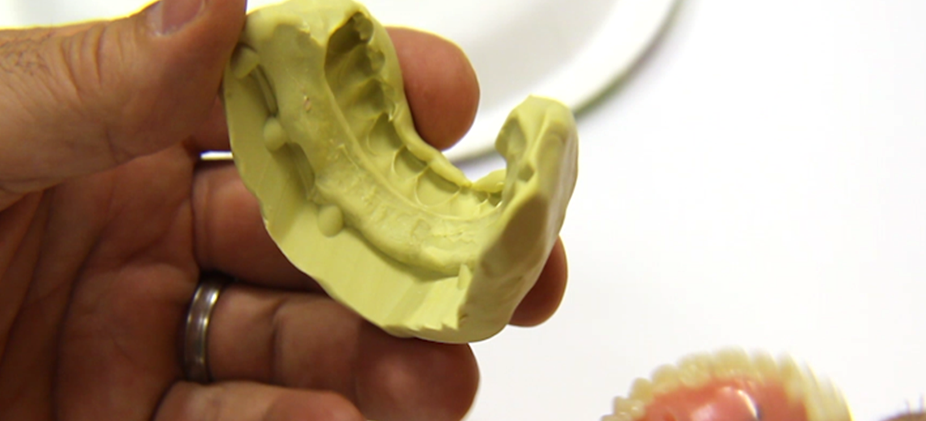
The picture illustrates the left side being correct and acceptable and the right side being incorrect due to the lack of occlusal surface captured in the matrix material.
Recapitulation of all the steps.
Take a bite.
Seat the Verification jig and lute it.
Take an impression of the luted jig with provided custom tray.
Duplicate the temporary.
Once you have completed all these steps, replace the temporary in the patient’s mouth and hand torque the screws to manufacturer recommendation. Place Teflon tape or floss in access hole and cover them with light body. At this point you are done with Appointment 1.
Call Allure Dental Studio for a pick-up. Return all components, models, impressions, and our Sequential Prescription™ filled out completely. Keep the remaining pages of the Rx for your records.
Appointment 2
frame try-in with setup
Remove the temporary from the patient mouth. Remove the plug, Teflon, and all screws. When you unscrew the prosthetic screws, they might stay in the access hole, or just come out attached to the driver. Always check the driver before putting it in the next hole. Once the temporary is removed from the patient’s mouth, give it to your assistant to have it cleaned thoroughly. Check the soft tissue and abutment for redness or swelling.
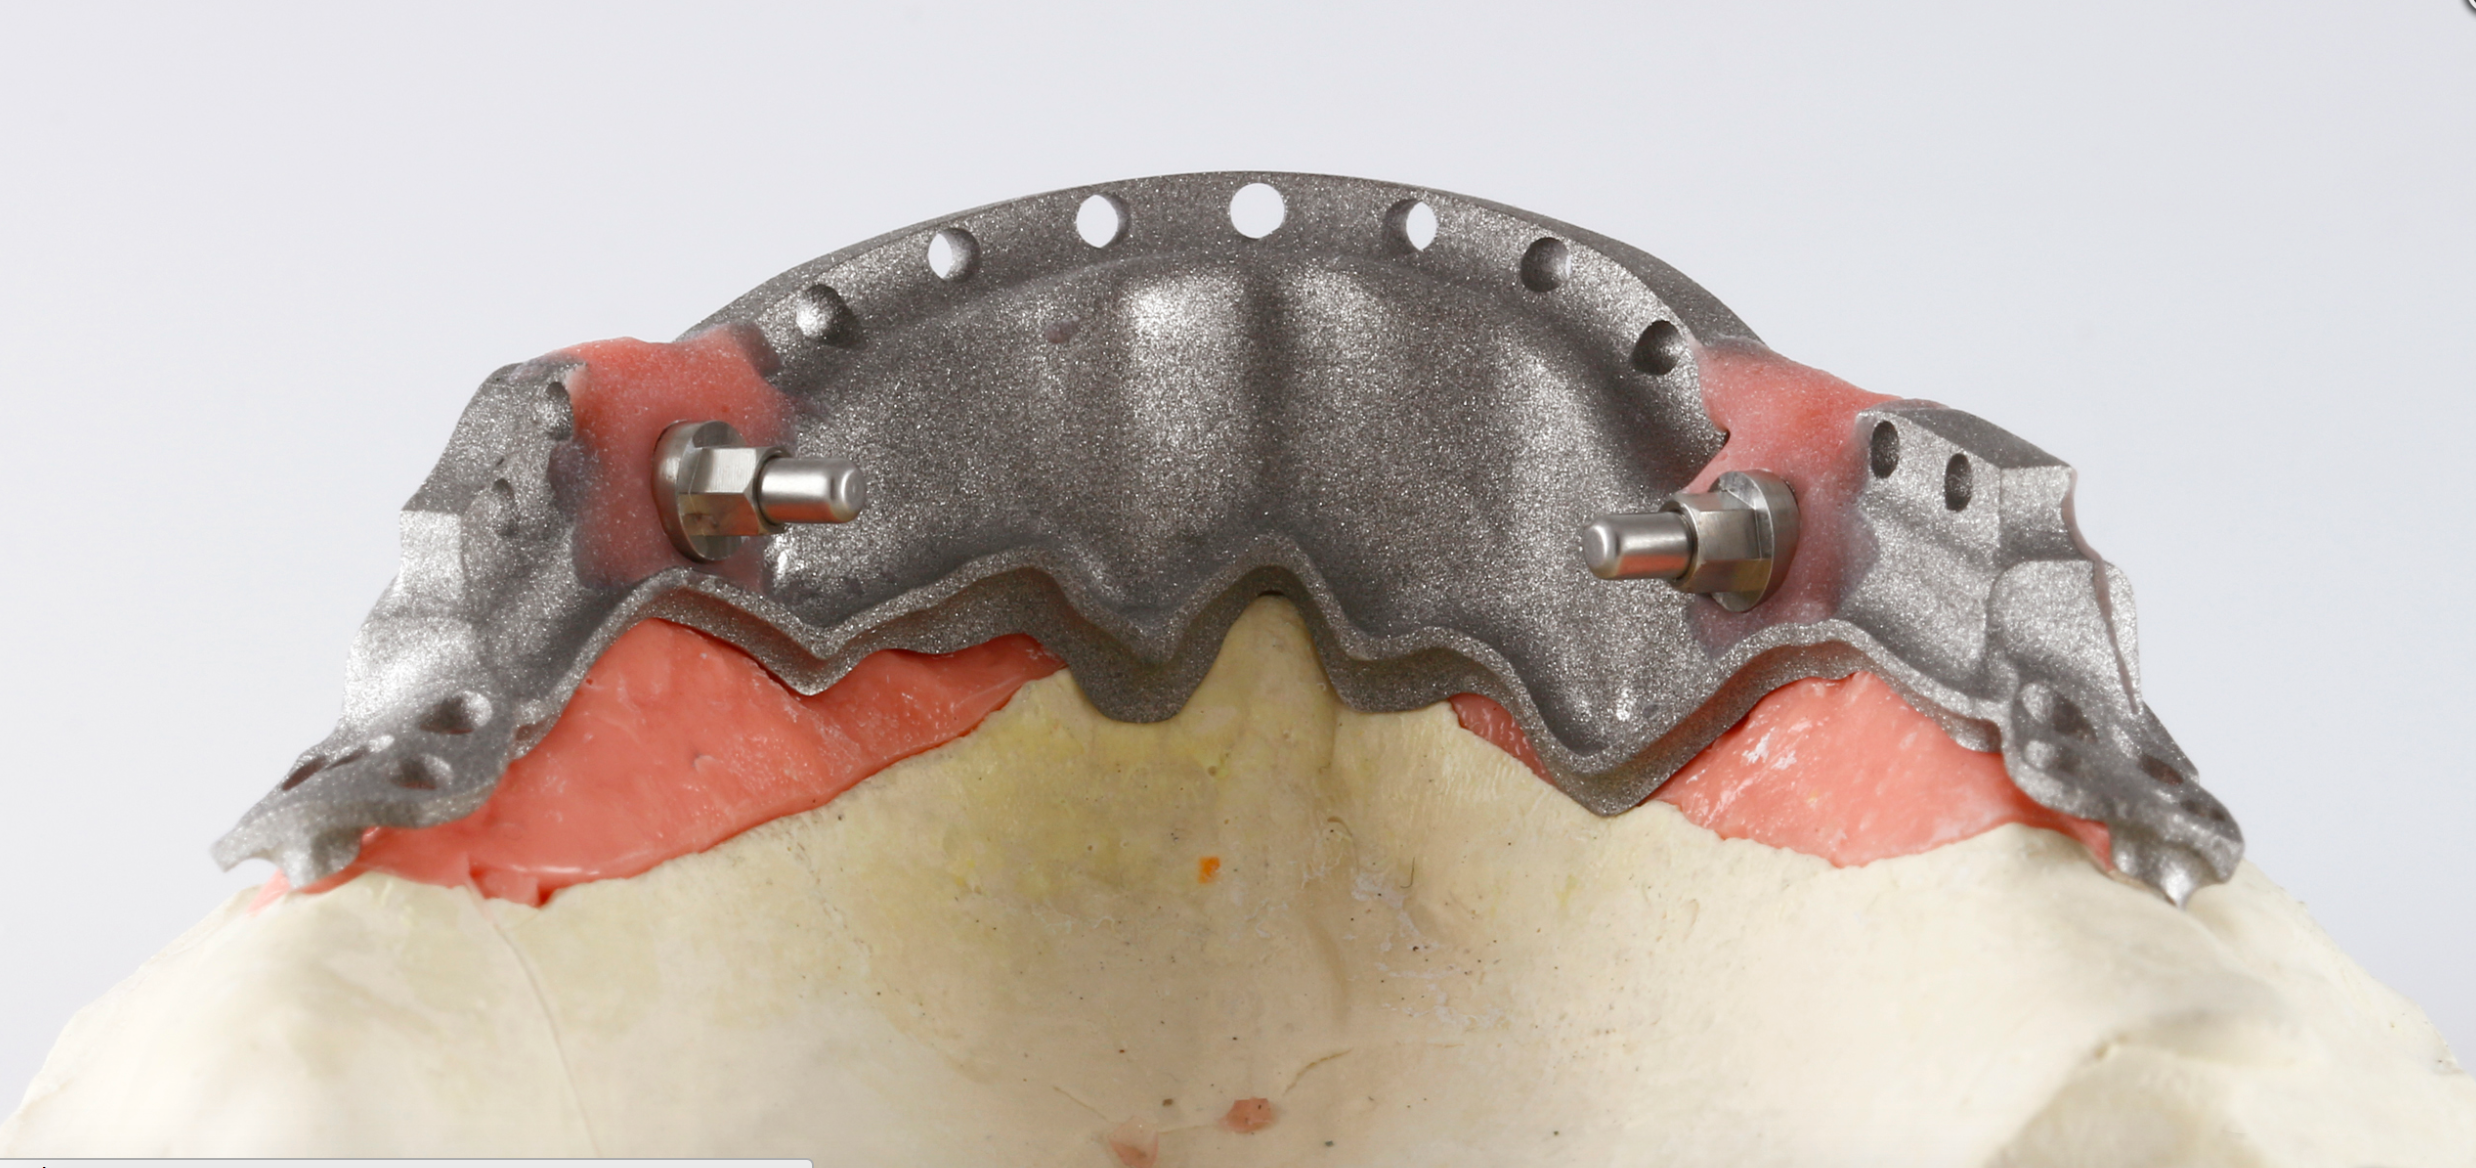
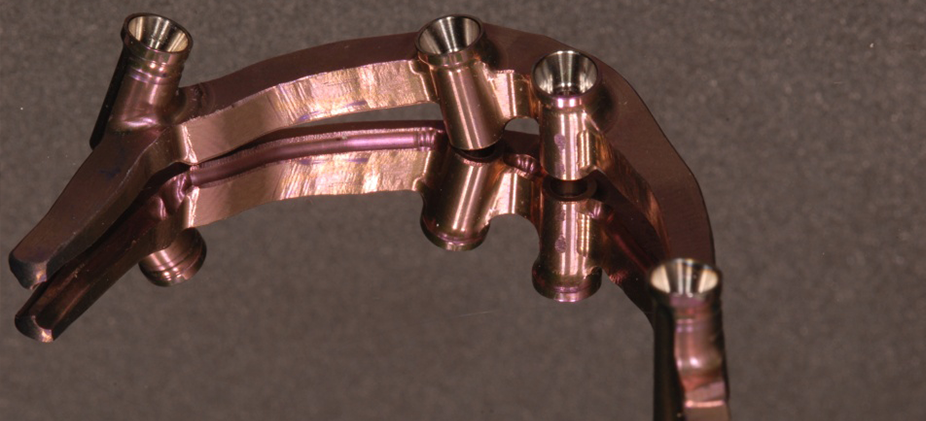
Try-in the frame and setup in the patient mouth. All our frames are anodized pink to blend better in the acrylic.
Hand-tighten each screw to manufacturer specification.
Evaluate fit, form, function

Group function is preferred with a light occlusion on the anterior.
Evaluate the VDO.
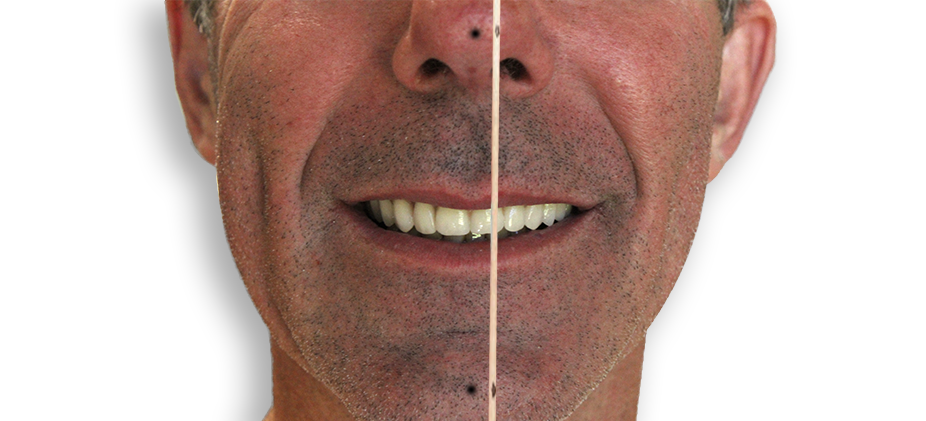
Check for fit, form, function, shade, phonetics, and midline. Make any final adjustments if needed.
Take pictures.
Once you are done with all these steps, replace the temporary in the patient’s mouth and hand torque the screws to manufacturer recommendation. Place Teflon tape or floss in access hole and cover them with light body. At this point you are done with Appointment 2
Call Allure Dental Studio for a pick-up. Return all components, models, impressions, and our Sequential Prescription™ filled out completely. Keep the remaining pages of the Rx for your records.
appointment 3
frame try-in with teeth
Remove the temporary from the patient’s mouth. Remove the plug, Teflon, and all screws. When you unscrew the prosthetic screws, they may stay in the access hole, or just come out attached to the driver. Always check the driver before putting it in the next hole. Once the temporary is removed from the patient’s mouth, give it to your assistant to have it cleaned thoroughly.
Check the soft tissue and abutment for redness or swelling.
The primary bar is designed with a 25-degree angulation to allow for an easy path of insertion and to avoid movement on the occlusal axis. You should practice the path of insertion on the model a few times before going to the mouth. You will find that the supra structure is easier to remove when in the patient’s mouth, compared to the model.
Place the primary bar onto the abutments in the patient’s mouth and check for passive and accurate fit.
Make sure that you did not infringe on any soft tissue.
Start placing a screw in each hole. Be sure to place all screws in before fully tightening. To ensure a successful seating of the bar, screw the prosthetic screws all the way and then back them out 30%. By doing this, you will allow the bar to be seated with a passive fit.
Once all the screws are placed, hand torque to manufacturer specifications.
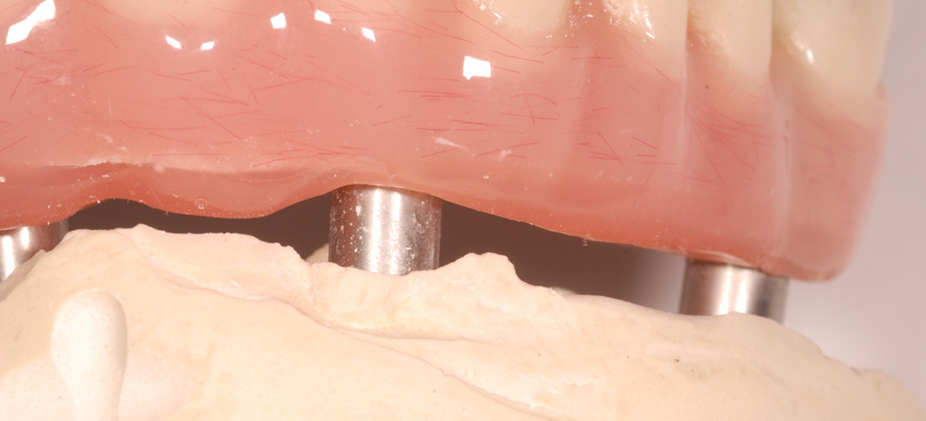
Now place the supra structure onto the primary frame. The friction between the two structures is what keeps them together without any possibility of movement.
The supra structure is designed to have a soft contact with tissues to seal the prosthesis.
To secure everything together push the two MK1 attachments pins toward the facial.
Try-in the setup in the patient’s mouth. All our frames are anodized pink to blend better in the acrylic.
Group function is preferred with a light occlusion on the anterior.
Evaluate the VDO.
Check for fit, form, function, shade, phonetics, and midline. Make any final adjustments if needed.
Take pictures.
Once you are done with the try-in, remove the supra structure from the patient’s mouth with the help of the small gold tool provided to you.
Unscrew the primary bar from the implant and remove it from the patient’s mouth.
Replace the temporary in the patient’s mouth and hand torque the screws.
Place Teflon tape or floss in access hole and cover them with light body. At this point you are done with appointment 3.
Call Allure Dental Studio for a pick-up. Return all components, models, impressions, bars, and our Sequential Prescription™ filled out correctly.
appointment 4
final delivery
Remove the temporary from the patient’s mouth. Remove the plug, Teflon, and all screws. When you unscrew the prosthetic screws, they may stay in the access hole, or just come out attached to the driver. Always check the driver before putting it in the next hole. Once the temporary is removed from the patient’s mouth, give it to your assistant to have it cleaned thoroughly.
Check the soft tissue and abutment for redness or swelling.
Place the primary bar onto the abutments in the patient’s mouth, making sure that you did not infringe on any soft tissue.
Start placing a screw in each hole. Be sure to place all screws before fully tightening. To ensure a successful seating of the bar, screw the prosthetic screws all the way and then back them out 30%. By doing this, you will allow the bar to be seated with a passive fit.
Once all the screws are in, torque them all the way to manufacturer specifications.
Fill all access holes with Teflon tape, then acrylic or composite and finish by polishing. Make sure not to infringe the supra structure’s space with any materials, or the fit will be compromised.
Now place the supra structure onto the primary frame and secure the two MK1 attachments.
Evaluate the bite, the VDO, and make any final minor adjustments if needed.
Have the patient practice the path of insertion, locking and unlocking the MK1 attachments and removing the appliance in front of you. Let them practice a few times with you and alone. Do not let them leave until they have mastered the process.
Take pictures for your own portfolio.
Take a panoramic X-Ray to verify that everything seats well and passively.
Congratulations, you are finished.
Make sure to provide your patient with the proper tools to maintain a healthy appliance. Allure Dental Studio partnered with TePe to create a Post-Op Care Kit to meet your patient's needs.